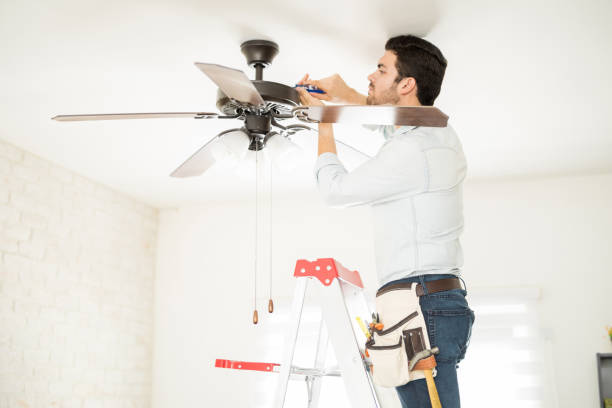
Fan Installation
Description:
Fan installation is a crucial task that ensures proper airflow, ventilation, and cooling in residential, commercial, and industrial settings. Installing a fan correctly can significantly enhance comfort, reduce energy costs, and improve air circulation. Whether it's a ceiling fan, exhaust fan, pedestal fan, or wall-mounted fan, following the right steps and guidelines is essential for safe and effective operation. Here’s a comprehensive guide on fan installation:
1. Types of Fans and Their Applications:
- Ceiling Fans: Commonly used in homes and offices, ceiling fans are mounted on the ceiling and help circulate air throughout the room. They are ideal for providing consistent cooling and can also come with built-in lighting fixtures.
- Exhaust Fans: Used in bathrooms, kitchens, and industrial areas, exhaust fans remove stale air, odors, and moisture, improving indoor air quality.
- Pedestal Fans: These portable fans stand on an adjustable pole and are perfect for providing targeted cooling in various rooms or outdoor spaces.
- Wall-Mounted Fans: Mounted on walls, these fans save floor space and provide directional airflow, suitable for small rooms or areas with limited space.
- Table Fans: Small and portable, table fans are placed on desks or tables, offering personal cooling in homes or offices.
2. Preparation for Installation:
- Select the Right Fan: Choose a fan that suits the room size, ceiling height, and specific requirements. Ensure the fan’s design and features meet your needs, such as remote control, speed settings, and lighting options.
- Gather Tools and Materials: Basic tools required include a screwdriver, drill, ladder, voltage tester, wire strippers, and electrical tape. Ensure you have the necessary mounting hardware, such as screws, brackets, and electrical box.
- Turn Off Power: Safety is paramount. Turn off the power supply to the area where the fan will be installed at the circuit breaker to prevent any electrical accidents.
3. Ceiling Fan Installation Steps:
- Remove Existing Fixture: If replacing an old fixture, carefully remove it and disconnect the wiring. Ensure the electrical box is fan-rated to support the weight and movement of the fan.
- Install the Mounting Bracket: Attach the mounting bracket to the electrical box, ensuring it is secure and level. The bracket provides a stable base for the fan.
- Assemble the Fan: Follow the manufacturer’s instructions to assemble the fan components, including the blades, motor housing, and downrod (if applicable).
- Connect the Wiring: Match the wires from the ceiling to the fan’s wiring: typically black (or red) for the fan, blue for the light (if applicable), white for neutral, and green or bare for ground. Use wire nuts to secure the connections and wrap with electrical tape.
- Attach the Fan to the Bracket: Lift the fan and attach it to the mounting bracket. Secure it with the screws provided, ensuring it is stable and level.
- Install Fan Blades and Light Kit: Attach the fan blades to the motor, ensuring they are evenly spaced and secure. If the fan includes a light kit, connect the wiring and attach the light fixtures as per the instructions.
- Test the Fan: Restore power at the circuit breaker and test the fan and light (if applicable) to ensure they function correctly. Check for smooth operation and balance.
4. Exhaust Fan Installation Steps:
- Choose the Location: Select a location on the wall or ceiling where the fan can vent outside. Ensure it is away from obstructions and close to an electrical source.
- Cut the Opening: Mark the area for the fan and cut an opening in the wall or ceiling. Use a template if provided with the fan.
- Install the Ductwork: Attach ductwork to the fan housing and extend it to the exterior vent location. Secure with clamps and seal joints with duct tape.
- Mount the Fan: Attach the fan housing to the wall or ceiling, securing it with screws. Connect the wiring as per the instructions, matching the appropriate wires.
- Install the Exterior Vent: Cut an opening in the exterior wall and install the vent cover. Connect the ductwork to the vent and secure it.
- Test the Fan: Turn on the power and test the exhaust fan to ensure it is venting correctly and operating smoothly.
5. Pedestal and Wall-Mounted Fan Installation:
- Pedestal Fans: Assemble the fan components, attach the base, and adjust the height as needed. Position the fan in a suitable location and plug it into a nearby outlet.
- Wall-Mounted Fans: Mark the mounting location on the wall, ensuring it is high enough to distribute air effectively. Drill holes and attach the mounting bracket. Mount the fan on the bracket and secure it. Connect the wiring if it’s a hardwired model or plug it in if it’s a plug-in model.
6. Advantages of Proper Fan Installation:
- Enhanced Comfort: Properly installed fans provide effective cooling and ventilation, enhancing comfort in living and working spaces.
- Energy Efficiency: Fans help reduce reliance on air conditioning, lowering energy consumption and utility bills.
- Improved Air Quality: Exhaust fans remove stale air, odors, and moisture, improving indoor air quality and reducing humidity.
- Aesthetic Appeal: Modern fans come in various designs and styles, adding aesthetic value to your home or office.
7. Safety and Maintenance Tips:
- Regular Cleaning: Dust and clean fan blades and housings regularly to maintain efficient operation and air quality.
- Check for Balance: Ensure fan blades are balanced to prevent wobbling and noise. Use a balancing kit if necessary.
-Inspect Wiring: Periodically check the wiring connections for signs of wear or damage and repair as needed.
- Professional Assistance: For complex installations or repairs, consider hiring a licensed electrician to ensure safety and compliance with electrical codes.
Proper fan installation is essential for optimal performance, safety, and energy efficiency. Whether installing a ceiling fan, exhaust fan, or any other type, following the right procedures and safety guidelines will ensure reliable operation and enhanced comfort in your home or workplace.