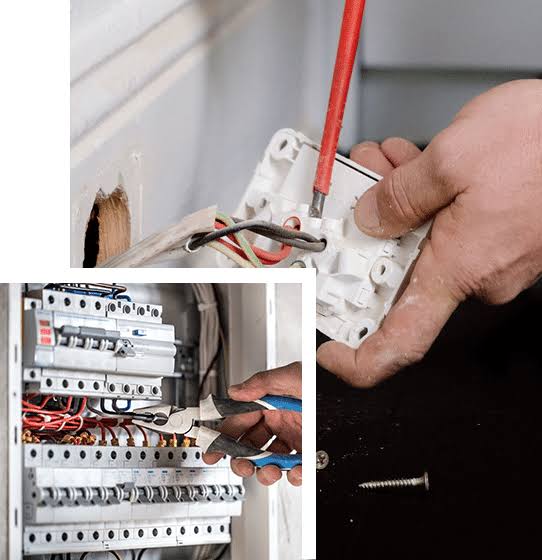
Labour charges for installation of one switchboard (up to twelve switches)
Procurement of spare parts (at extra cost)
Minor wiring up to 2m, if needed
Clean-up after the service
Flicksy warranty & damage cover*
Major wiring (more than 2m)/ new wiring (at extra cost)
 ### Switchboard Installation
**Description:**
Installing a switchboard is a complex and crucial process that involves several detailed steps to ensure safety, functionality, and compliance with electrical codes. A switchboard is a critical component in an electrical system, distributing power to various circuits and providing a central control point for electrical devices. Here is a comprehensive guide on the process of switchboard installation:
1. **Preparation:**
- **Assessment and Planning:** Conduct a thorough assessment of the electrical requirements, including load calculations and the number of circuits needed. Plan the layout of the switchboard, considering factors such as accessibility, ventilation, and future expansion.
- **Gathering Materials and Tools:** Collect all necessary materials and tools, including the switchboard panel, circuit breakers, wiring, conduit, mounting hardware, and safety gear such as gloves and goggles.
2. **Selecting the Location:**
- **Choosing a Suitable Site:** Select a location that is dry, well-ventilated, and easily accessible for maintenance. Ensure the area is free from any obstructions and complies with local electrical codes.
- **Preparing the Site:** Mark the installation area and prepare it by clearing any debris and ensuring the surface is level and secure.
3. **Mounting the Switchboard:**
- **Positioning the Switchboard:** Position the switchboard panel on the wall or mounting surface, ensuring it is level and properly aligned. Use a spirit level to check for accuracy.
- **Securing the Switchboard:** Securely mount the switchboard to the wall or structure using appropriate fasteners and mounting brackets. Ensure it is firmly attached and does not move or wobble.
4. **Connecting Electrical Components:**
- **Main Power Connection:** Connect the main power supply to the switchboard. This typically involves connecting the incoming service wires from the utility company to the main breaker or disconnect switch in the switchboard.
- **Installing Circuit Breakers:** Install circuit breakers into the switchboard according to the planned layout. Ensure each breaker is properly seated and securely fastened.
- **Wiring the Circuits:** Carefully strip the insulation from the electrical wires and connect them to the appropriate circuit breakers and bus bars within the switchboard. Use wire nuts or terminal blocks to secure the connections and ensure they are tight and free from any loose strands.
5. **Grounding and Bonding:**
- **Grounding the Switchboard:** Connect the grounding conductor to the grounding bus bar in the switchboard. Ensure a secure and continuous grounding path to prevent electrical shocks and ensure safety.
- **Bonding Components:** Bond all metallic components of the switchboard and associated electrical system to the grounding system to eliminate potential differences in voltage and ensure safety.
6. **Testing and Verification:**
- **Power Off:** Before performing any testing, ensure the power supply to the switchboard is turned off at the main electrical panel to prevent electrical shocks and accidents.
- **Inspecting Connections:** Conduct a thorough inspection of all electrical connections, ensuring they are secure, properly insulated, and free from any defects or potential hazards.
- **Functionality Test:** Restore power and test the switchboard to verify its functionality. Check that all circuit breakers operate correctly and that there are no signs of overheating, sparking, or other issues.
- **Voltage and Continuity Tests:** Use a multimeter to perform voltage and continuity tests to ensure all connections are correct and that the electrical system is functioning as intended.
7. **Final Steps and Cleanup:**
- **Securing and Sealing:** Securely fasten the switchboard cover and ensure all screws and fasteners are tightened. Seal any gaps or openings to prevent dust and debris from entering the switchboard.
- **Labeling:** Label all circuit breakers and switches clearly to indicate their corresponding circuits and loads. This helps in easy identification and troubleshooting in the future.
- **Cleanup:** Remove any debris, packaging materials, and tools from the installation area, leaving it clean and tidy.
8. **Documentation and Compliance:**
- **Recording Details:** Document the installation process, including wiring diagrams, circuit breaker ratings, and any modifications made to the electrical system.
- **Compliance Check:** Ensure the installation complies with local electrical codes and regulations. If required, arrange for an inspection by a licensed electrician or local authority to verify compliance.
Proper installation of a switchboard ensures reliable distribution of electrical power, enhances the safety of the electrical system, and provides a central point for managing electrical circuits. It is recommended to consult a qualified electrician for switchboard installations to ensure safety, compliance, and optimal performance.